 |
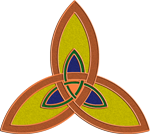
How to Draw A Trinity Knot with an Annulet
The following instructions will help you create a Trinity Knot. Using Adobe Illustrator CS
|
|
| Create a new document, 10" x 10". Under View, turn on Show Grid, Snap to Grid, Snap to Point. |
|
|
 |
Select
the polar grid tool, under the line tool. Create a polar grid, 4" x 4", with no concentric dividers and 3 radial dividers. This is your Base Circle. Use the transform window to place the center of the grid at x 4", y 4". If you want the trinity knot to be standing on its point, rotate the polar grid 180 degrees using the transform window. Your drawing should now look like the one on the left. |
|
 |
Select
the ellipse tool, under the rectangle tool. Create an ellipse 4 1/2 " by 4 1/2". /This will be one of your Inner Arcs. Using the direct selection tool, place the center of the elipse at one of the points on the polar grid. Your drawing should now look like this. |
|
 |
Make two more elipses of the same size and put on the
other two points. Repeat the process with 5" circles. These are your Outer Arcs.
You should now have an image that looks like this, with a Trinity Knot in the center.
|
|
 |
Delete
the polar grid. Make a 3 1/2" circle and place the center at x 4", y 4" as above. This is your Outer Ring. Make a 3" circle and place the center at x4", y4" as above. This is your Inner Ring. Now your Trinity Knot looks like this. |
|
 |
Remove
unneeded arcs. Using the direct selection tool, click on the
area you wish to erase, then use the eraser tool, under the pencil
tool. Use the eraser to remove a
small section from each end of the area you wish to remove, then click
on the leftover arc and delete it. Or
click with the eraser on one end of the area you wish to erase,
then the other, then click in the middle, once an area of that circle
has been removed. Erase the outer circles to the outer circles, and the inner circles to the inner circles, so the lines do not cross at the points. Now your Trinity Knot should look like this. |
|
 |
To make
the Trinity Knot intertwine, Go around the circle, removing interior lines from the circle and from the arcs alternately: Then remove the interior lines on the arcs, following the same pattern. Clean up any rough erasures and scale the Trinity Knot to the desired size. |
|
| You can make many different designs using these directions. Here's a few available from CafePress.com/fogweaver on apparel and other merchandise. |
   |
Drawing the Trinity Knot
Using Pencil and Paper
Follow the instructions above, with the following changes:Decide how big you want your finished knot to be. The finished knot will be about 1 1/4 times the diameter of your base circle. This means it will be the diameter of the larger arc of the knot. Divide the size you want your knot to be by 10 to get the base unit for the radius of your circles. For example, if you want a finished knot size of 5", your base unit is 1/2"; for a finished knot size of 20", your base unit is 2":
| Part of Knot |
Diameter |
Radius |
Finished Size of Knot 5" | Finished Size of Knot 20" |
| Base
Unit |
1 Unit |
1/2 Unit |
1/2" |
2" |
| Outer Arc | 10 units | 5
units |
Radius
2 1/2 " |
Radius
10" |
| Inner Arc | 9 units | 4
1/2 units |
Radius
2 1/4" |
Radius
9" |
| Base Circle | 8 units | 4
units |
Radius
2" |
Radius
8" |
| Outer Ring | 7 units | 3
1/2 units |
Radius
1 3/4" |
Radius
7" |
| Inner Ring |
6 units | 3
units |
Radius
1 1/2 " |
Radius
6" |
Find the center of the design area. The finished Trinity kKnot will be slightly wider than it is tall, so go down about 1/2 unit from the center of the design are to place the center of the knot.
After you draw the base circle, find the center of the arcs either using a protractor and placing then 120 degrees apart, or using a compass. Make the first mark for the center of a set of arcs. Place the tip of the compass on this point. Using the same radius as for the base circle. mark points on either side of the first where the compass intersects the circle. Proceed as above. For more complete hand-drawing instructions, see Creating Celtic Knotwork - Trinity Knot.